

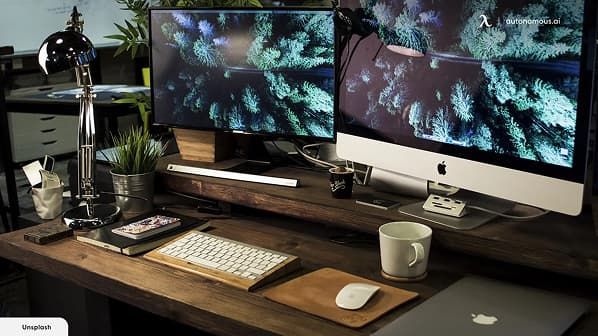
For the majority of Mac users, a single screen simply isn't sufficient. Designers require layouts side by side, developers like several windows, and professionals are opening spreadsheets while participating in video calls. The addition of extra monitors has the potential to have a huge improve on productivity, however the configuration process under macOS is not always straight forward and can be a plug and pray. Yet it is just a matter of having the correct approach to get a multi-monitor environment that feels natural and efficient.
A Brief Guide to Construction Jobs
Related searches
Know What Your Mac Can Handle
Before you purchase additional monitors, you should first learn about what is supported in your version of Mac. For example, a MacBook Air running an M1 chip will only support a single external monitor but newer M2 machines support more when certain docking solutions are used. MacBook Pro models that include M1 Pro, M1 Max, and subsequent chips support multiple monitors with high refresh rates at once. Looking at the spec sheet of your Mac—maximum refresh rates supported and maximum external monitors supported—is a way to save yourself from the disappointment and purchase the correct kit.
Select the Right Ports and Adapters
The port standard is just as important as the monitor itself. Most newer Macs employ Thunderbolt 3 or Thunderbolt 4 which also has the USB-C connector and can support amazing resolutions. If you use HDMI compatible display it requires Thunderbolt to HDMI adaptor. When selecting an adapter or dock, it is worth selecting one of good quality because cheaper ones may result in flickering or the resolution being lower. Additionally, you can also connect 2 or more monitors to some of the docking stations using a single cable, making the working place clutter free and easy to handle.
Configure Displays in macOS
After you register, go to macOS’s System Settings to configure the setup. Under “Displays,” you can drag and place each of the monitors to match the actual configuration of the monitors on your desk. This is crucial—you want the configuration in Virtual Machines to match the configuration so that when you are navigating with the cursor, you feel comfortable. You may select to mirror your primary display or extend the desktop. Extending is usually better while working, because then you will have more space to work with. You may want to, for example, have a video call open on one and papers or notes open on another.
Adjust Resolution and Refresh Rates
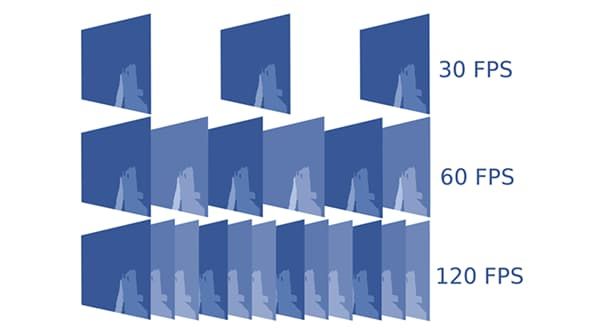
Even when paired, monitors won’t quite be seamless unless fine-tuned. macOS allows you to tweak resolution so that text and icons are a comfortable view, and it’s particular to when you’re working off 4K monitors where native text is uncomfortably petite. Refresh rates are another area. Monitors are generally 60Hz but come in a few 120Hz, which are smoother to watch. When your Mac is supported for it, though, it’s a huge help when scrolling and when you’re in edit mode. Higher refresh rates do, though, take more from the GPU in performance, so it’s a balancing act to maximize performance but still remain silky.
Stay Organized with macOS Tools
With multi-monitor systems it will soon become cluttered with dozens of individual windows on each screen. It is here that macOS tools such as Mission Control and Spaces are useful. Mission Control gives you a bird's-eye window view of windows so you can simply drag them across monitors. Spaces lets you have multiple desktops and assign them to different tasks—work on one, communications on another, entertainment on the third. Employing these capabilities judiciously keeps screens clear and not confusing.
Pay Attention to Comfort and Layout
Seamlessness is a technology virtue but an ergonomics virtue as well. If monitors are not aligned, you will soon have neck tension, eye strain, and worse. Your main display needs to be at eye level, and periphery monitors tilted slightly inward. Height-adjustable monitor arms can make this happen and clear valuable space off your desk. Lighting is another factor: glare from windows can make even the best screens tiring to look at. Well-designed desk layout makes your multi-monitor workspace a place you want to return to.
The Bottom Line
Adding multiple monitors to a Mac can turn work into a whole new experience, but more than a second monitor plug is needed. It involves inspecting the display capability of a Mac, selecting the right connections, controlling macOS settings, restoring visual performance, leveraging on-board administrating tools, and building an ergonomic workspace. If done correctly, a multi-monitor configuration is no longer a technical hurdle but an operating powerhouse.
< Prev

Next >
Guess you like
-

Bring Back Clear Dialogue: Three Samsung TV Settings That Make Speech Easy to Hear
-

Why Kobo Is Quietly Winning Over Kindle Readers
-

How to Own a Convertible Without Breaking the Bank
-

GFiber Merges With Astound Broadband To Redefine Connectivity
-

Switch 2 Accessories Redefining Nintendo’s New Console
-

Arcade Hits That Found Bigger Crowds Beyond America
Trending
-
 1
1Six Hidden Features Transforming Your Opera Daily Browsing
-
 2
2Forza Horizon Six Welcomes Veteran Drivers With Elite Supercars
-
 3
3The Dawn Of DeepSeek V4: Reshaping The AI Landscape Against Industry Giants
-
 4
4Samsung Transforms OLED With Glasses Free Three Dimensional Technology
-
 5
5Unleashing Hidden Speed on Your Modern Sony Console
-
 6
6Canva Transforms Daily Workflows Through Seamless Connectivity